代码
urlencoded转string
1 | query_string = 'access_token=CB4C8F99D9B3E4AD376E7CF179CFA470&expires_in=7776000&refresh_token=4CCB49CAD66A9506F0621CE8E427F492' |
dict转urlencoded
1 | params = {'criterias[]': ['member', 'issue']} |
urlencoded转string1 | query_string = 'access_token=CB4C8F99D9B3E4AD376E7CF179CFA470&expires_in=7776000&refresh_token=4CCB49CAD66A9506F0621CE8E427F492' |
dict转urlencoded1 | params = {'criterias[]': ['member', 'issue']} |
让【节点】自适应【标签】
Tool => Fit Node to Label
pip提供python的包管理操作
下载安装脚本get-pip.py
python get-pip.py
win下添加C:\Python27-32\Scripts到PATH
安装
pip install PACKET_NAME
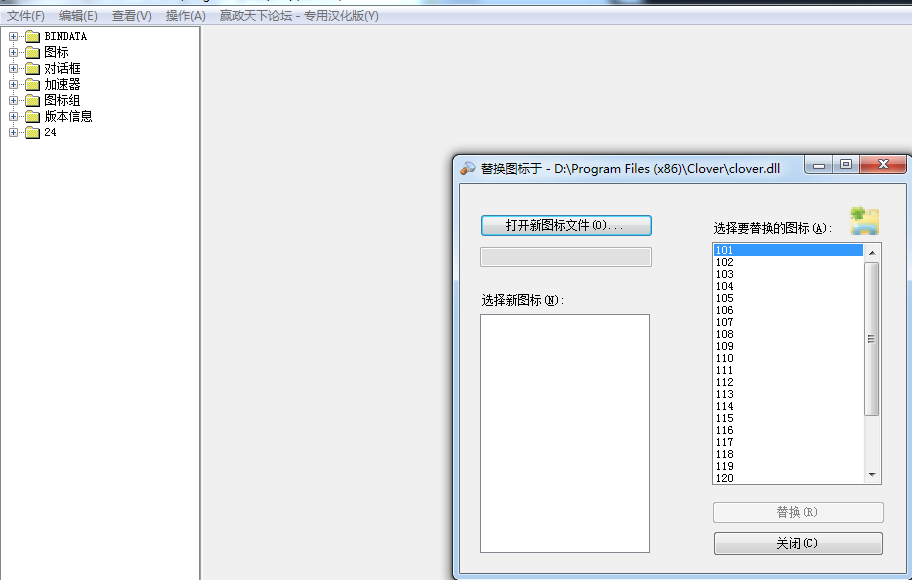
使用ResHacker打开clover.dll
【操作】=>【替换图标】=> 【选择要替换的图标】=>101
python -m pydoc CONTENT
python自包装可以在任意路径下执行pydoc CONTENT
建立脚本文件pydoc.py
#!/usr/bin/env python
# encoding: utf-8

import os
import sys

if len(sys.argv) != 2:
    print("usage:pydoc.py OBJECT")
    exit(1)

cmd = 'python -m pydoc ' + sys.argv[1]
# print(cmd)
os.system(cmd)
复制到PATH目录下
建议自建目录(Win:X:/XXX/bin,Linux:/XXX/bin),添加该目录到PATH
优点:
【Windows建议】
修改环境变量PATHEXT追加.py,这样直接使用pydoc CONTENT即可,不用每次都输入’.py’!
cd %HOMEPATH%
mkdir .ssh
ssh-keygen -t rsa -C "qian_cheng_long@163.com"
.ssh/rd_rsa)添加到ssh-agent
ssh-agent -s
ssh-add ~/.ssh/id_rsa
复制到粘贴板
clip < ~/.ssh/id_rsa.pub
将.ssh/rd_rsa.pub内容添加到github
测试是否添加成功
ssh -vT git@github.com
解压源码
进入到%WXWIN%\build\msw
清理项目
mingw32-make -f makefile.gcc SHARED=1 UNICODE=1 BUILD=release clean
编译
动态库,发行版
mingw32-make -f makefile.gcc SHARED=1 UNICODE=1 BUILD=release
动态库,调试版
mingw32-make -f makefile.gcc SHARED=1 UNICODE=1 BUILD=debug
静态库,发行版
mingw32-make -f makefile.gcc SHARED=0 UNICODE=1 BUILD=release
静态库,调试版
mingw32-make -f makefile.gcc SHARED=0 UNICODE=1 BUILD=debug
注:
可以添加-j N(N指当前CPU核心数),加快编译速度
每种版本可以根据需要编译
动态库对应的目录(%WXWIN%\lib\gcc_dll),静态库对应的目录(%WXWIN%\lib\gcc_lib)
Debug版的库名称会有d后缀,UNICODE版的库名称会有u后缀
markdown中,插入图片的语法为:

使用本地路径:在hexo/source目录下新建一个img文件夹,将图片放入该文件夹下,插入图片时链接即为/img/图片名称。
使用微博图床,地址http://weibotuchuang.sinaapp.com/,将图片拖入区域中,会生成图片的URL,这就是链接地址。
log4cpp-1.1.1include目录复制到目标目录下log4cppD.lib,log4cppLIB.lib)放到目标目录的子目录lib最终目录结构:
└─log4cpp-1.1.1
    ├─include
    │  └─log4cpp
    │
    └─lib
include目录和lib目录log4cppD.liblog4cppLIB.lib